PowerPoint allows you to create headers and footers, that is, information that appears at the top and bottom of all slides. This information will typically include the name of the presenters, their affiliation, and the presentation title, slide number, and date, but other information can be added as well. However, be careful not to spoil your presentation with too much information.
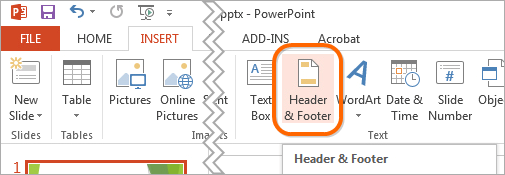
- First, you need to access the INSERT tab and click on the Header & Footer button.

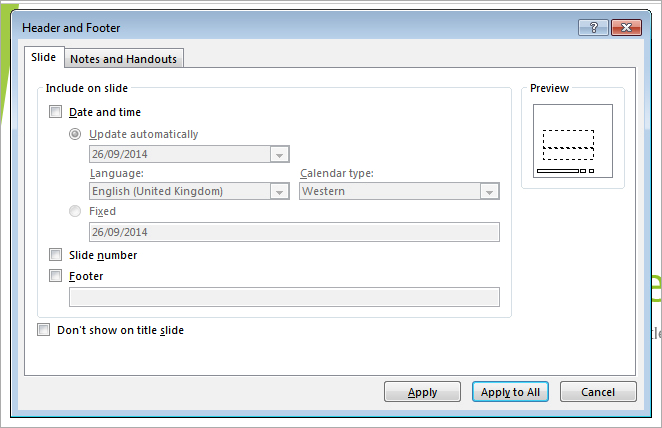
- A dialog box will appear, as shown in the screenshot below.

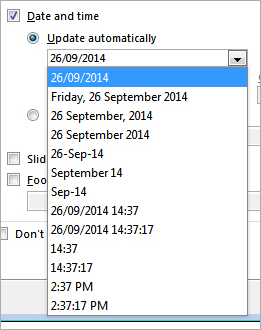
- The first option available is Date and Time. If you select the Date and Time checkbox, you will be given two options: Update automatically and Fixed. The Update automatically option means that the date and time will updated every time you open the presentation, which will save you the time and effort involved in updating it manually. The Fixed option means that, even if you open the presentation a month from now, the date and time will be fixed to the time when you created the header and footer. If you select Update automatically, you will be given a number of different formats for displaying the date and time, as shown below in the screenshot. Make a selection that best fits the format of your presentation.

- The next two options are Slide Number and Footer. It is usually a good idea to include the slide number so that it’s easier for you to refer back and forth to individual slides while you present. If you select Footer, you will be given the chance to write up your own customized text. Usually this would be your name and affiliation, as seen in the example below.

- The last option determines whether the header and footer is shown on the title slide. It is aesthetically better not to show this information on this slide since most of that information will be already displayed, such as the title of the presentation, the name and affiliation of the presenter, and sometimes even the date. So select Don’t show on title slide. Click Apply to All to save the changes and to update the slides.
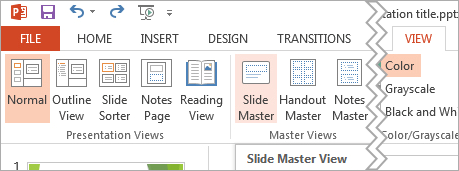
- You can adjust the appearance of the header and footer by selecting the VIEW tab and clicking on Slide Master.

- Once in the Slide Master view, you can make any changes you like to the header and footer by moving or resizing the text boxes and changing their text attributes via the HOME or FORMAT tabs.
- Once you have finished your changes, click the Close Master View button. You will notice that your changes have been applied to all slides.


