PowerPoint presentations are much like college essays. They present cited, relevant information that is meant to educate and inform. They are made for a wide audience. Do you remember what your teachers used to advise you to do when they assigned an essay writing assignment?
“Don’t forget to make an outline before you write.”
You can use the same concept in your next presentation. Just because it contains pictures and encourages interactivity doesn’t mean that it can’t be approached in a similar fashion. Outlining key points is a powerful strategy, and PowerPoint 2013 has a very useful tool to help you do it. This article will explain the importance of outlining and how to use the PowerPoint Outline View.
The answer is fairly simple: outlining focuses your presentation. It acts as a sort of pre-first draft, giving you leeway to throw ideas on the table and figure out which ones work best for your presentation. By putting everything you’ve thought of in one space, you can see your ideas and points side-by-side and more efficiently eliminate ones that don’t contribute to your overall message. By tightening the screws and oiling the gears, you will have a more cohesive presentation that works well both in presenting (on your end) and receiving (on the audience’s end).
When you switch to Outline View in PowerPoint, you will see all the text currently within your title and text placeholders in a document-style format that appears on the left side of the screen. This will allow you to go through all the text and edit it without having to locate your text boxes one by one, slide by slide. It is a very useful tool to use when you want to focus on both text and image in a single go, consolidating your work from different areas of the screen.
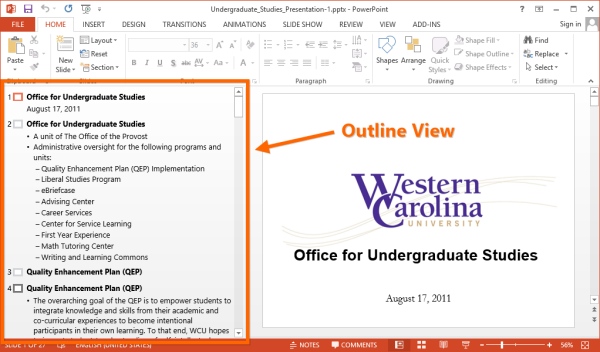
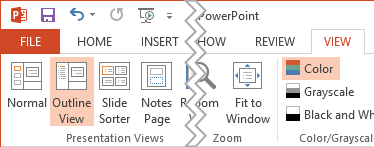
Outline View can easily be switched on and off by using the Ctrl+Shift+Tab key combination or via VIEW → Outline View.
Text typed in Outline View will appear in the title of the current slide. Press Enter to add a new slide. By pressing Tab the current item will be indented and become a subitem of the previous item. Shift+Tab removes the indentation. All of these features are also accessible via the context menu, which can be accessed by right-clicking an outline item.
If you have already created an outline in Microsoft Word, you can easily convert it into PowerPoint slides. PowerPoint will use the heading styles that you assigned to your text in Word to determine which paragraphs are titles and which are content. Heading 1 lines will become slide titles, Heading 2 lines will become bulleted items on the slides, and Heading 3 lines will become sub-bulleted items.
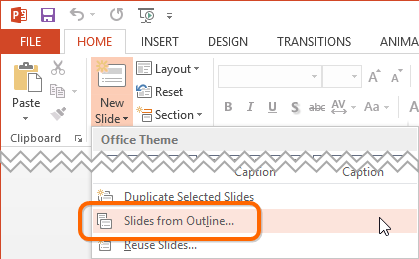
To import an existing outline file, click the drop-down menu under New Slide on the HOME tab, and select Slides from Outline. Navigate to the outline file, and click Insert.
Another option is to create an outline in .txt format using Notepad (or any other text editor), as shown in the screenshot below.
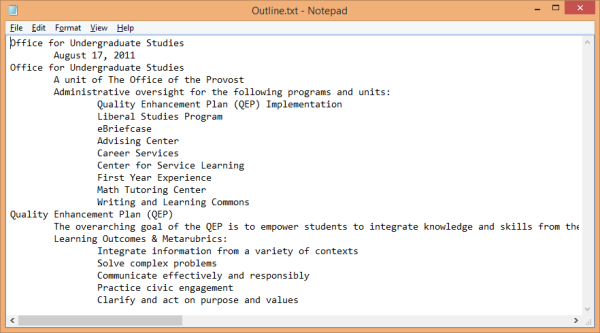
Normal paragraphs will be converted into slide titles, whereas paragraphs indented by tabs will result in bulleted lists.
All of the best presentations include three things: research, quality, and purpose. PowerPoint’s Outline View can help you achieve the quality work you desire as you create your presentation and impress your audience with your vision. By consolidating all of your important content into a single segregated window, you can more easily weed out the text you don’t want and refine the text you do want. That way, by the end, you’ll achieve your goal.
You can use beautiful font types to create a presentation. However, if audience members do not have the same font installed on their computers, the font will not display correctly when they view your presentation because PowerPoint substitutes an unknown font with what it determines as a similar type. This automatic matching process often leads to disastrous results. However, PowerPoint 2013 enables you to embed your preferred fonts into the presentation so that they appear as you intended regardless of whether the computer displaying the slideshow has that particular font installed.
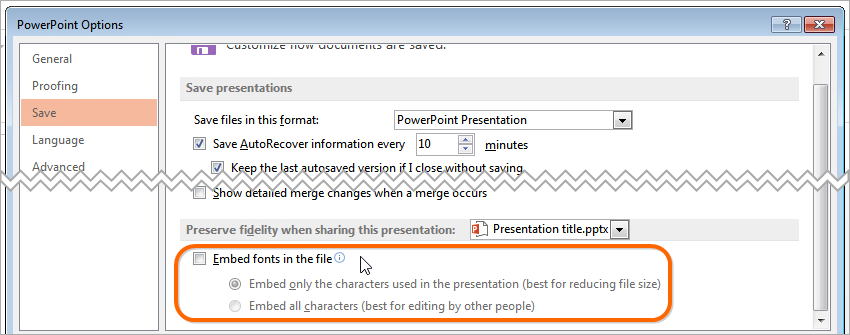
Please note that only TrueType and OpenType fonts can be embedded.
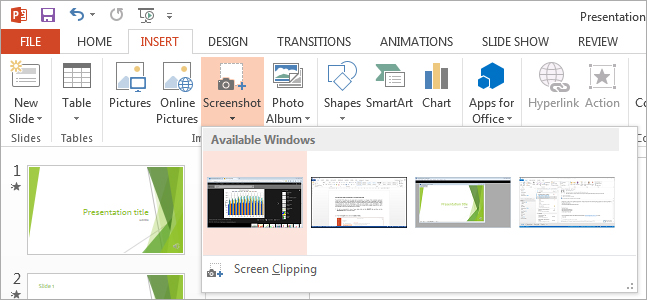
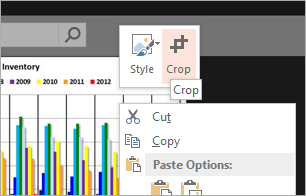
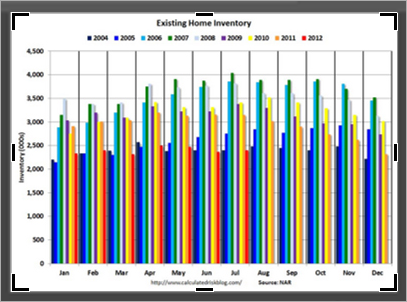
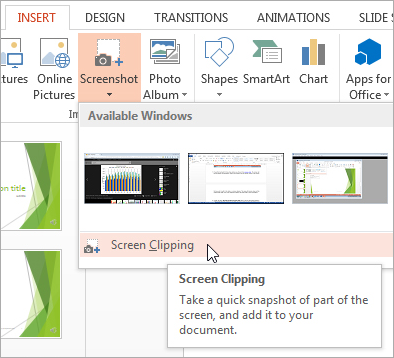
PowerPoint 2013 makes it very easy to add a screenshot—an image of your computer screen—to a slide:
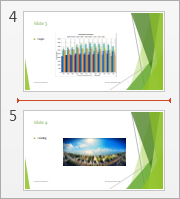
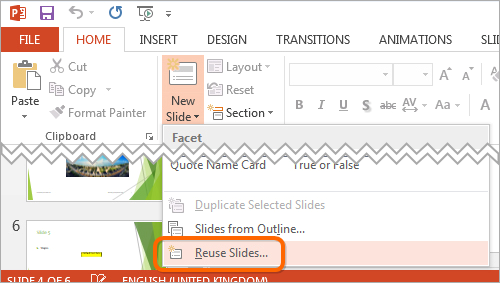
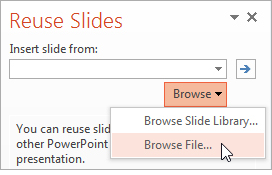
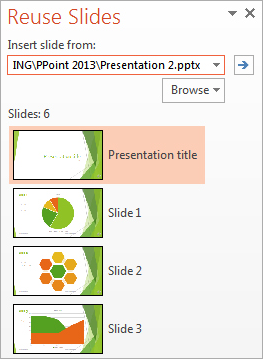
PowerPoint 2013 enables you to add one or more slides to your presentation from a different presentation that is either located on your computer or on a network without having to open the other file.
It is always a good idea to reduce the size of your PowerPoint presentation, particularly if your presentation contains large photos or images. Picture compression can quickly reduce the file size of one or all of your photos at the same time. File reduction is especially useful when you want to upload your presentation to a website or when you need to email your presentation to your audience.
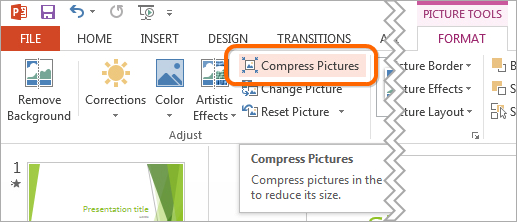
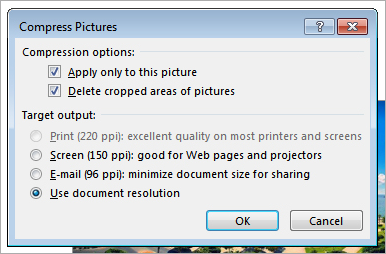
If you compressed your presentation and the file is still too large, repeat the steps above and tweak different options.
Slides with fewer words will always be more effective than slides with lots of words.
Your worst-case scenario is that you present a slide with lots of words. You stand at the front of the room and start talking. You are putting the subject in context. You deliver a 45-second overview that lets your audience understand the big picture. But they haven’t heard a word that you’ve spoken because they’ve been reading your slide. At the point where you start talking at the detail level, your audience has no idea what you’re talking about because they didn’t hear you put the topic in context.
The purpose of the words – and images – on your slides is to help members of the audience get an overview, as well as small bites of detailed or summary data. Your text and images help them get organized. Your slide’s words should be traffic signs and not long expositions. Be a person of few words.
If you’re delivering a PowerPoint training presentation entitled “Ten tips to increase your sales” then you can be certain that you have the attention of the people in the audience. You can put some extra words on your slides, and you probably won’t experience any bad results from your error. The people in your audience are motivated to learn. They will.
By contrast, if you work in the personnel department of a large corporation, and your presentation is called “Replacing the old HRM Process Procedure with the new HRM Procedure Process” then you can count on people dozing off, early and often. If you want to keep them motivated, then show them short slides. Make sure all of your bullet points “agree.” That is, make all of your bullet points verb phrases, or all of them noun phrases. Make all of these phrases roughly the same length. Make it as easy as possible for the audience to pay attention to the presentation.
If you’re presenting information that is complex or technical in nature, then try to craft bullet points that are one or two words long. Consider replacing too-long text with well-designed charts or graphics. Speak slowly so that people can take notes. Encourage them to ask questions.
Delivering complex information to a knowledgeable audience isn’t particularly difficult. Delivering complex information to a mixed audience of power-users and newbies can be a nightmare. Similarly, it’s very difficult to deliver information – even if it isn’t particularly complex information – to an audience in which only 50 percent of the people speak English as their first language.
With a mixed audience, you should put more words on each slide. And slow down the pace of your delivery. Read each bullet point, and then explain it. Encourage questions and comments.
A good target would be a three-word title plus five bullet points of four words each.
Try to use fewer words. If the topic of a slide is “Why should you buy our product?” then use “Benefits” as the title. And the bullet points could be:
Again, you’re creating street signs and putting your thoughts in context. You don’t have to present all of your information in writing on your slides.
ShapeChef is a tool that helps you find and manage graphics and charts for your presentations. Click here for details.